What to do if your extruder stops feeding filament
If you notice your prints deteriorating, are having issues with the first layer not sticking to the bed or no filament is being extruded at all (ie the head is flying above the bed with no plastic underneath) it is highly likely that you are experiencing an extruder jam. The enclosed nature of the Titan extruder unfortunately makes this more common since small pieces of filament, scraped off by retraction moves, can start to collect in the body of the extruder and interfere with the gearing. If you change filament frequently the bulbous end (built up in the hot end when you heat it to change the filament) can break off and jam in the gearing as well – there is an example in the pictures below.
Fortunately this is a very easy problem to fix, takes very little time and with a bit of practice simply becomes a normal part of maintaining your printer. A better way to cure this problem is to upgrade to an all metal, dual geared (and open bodied) extruder but for those who don’t want to take that step the following instructions will have your plastic flowing freely again…
[NOTE – these instructions assume you have already unloaded any filament from the printer – if not you need to do that first 🙂 ]
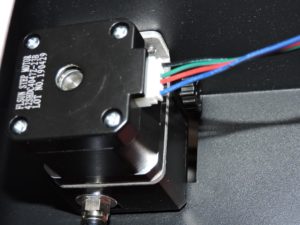
On the side of the extruder you will find the connections for the stepper motor. Disconnect these by gripping the white plastic connector and pulling it away from the motor. You don’t need tools for this since finger pressure will be enough but avoid the temptation to pull on the wires – you may get away with it once or twice but, in the end, you’ll pull a wire out and that’s not a simple fix. Instead just grip the plastic flange and pull the plug out.
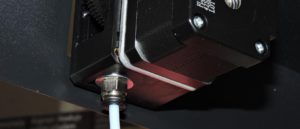
The white teflon tube that runs from the bottom of the extruder to the print head is called a Bowden tube. You need to remove it before you can remove the extruder. The black circular part that surrounds the tube can be pushed upwards until it touches the metal section. You should then be able to gently pull the tube downwards and leave it hanging free inside the machine.
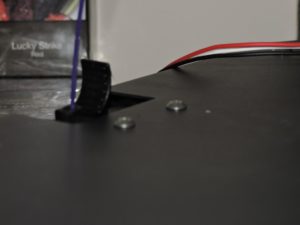
On top of the case, next to the extruder, are 2 mount screws. You will need a 2mm Hex key for these. Hold on to the extruder as you remove the second screw and it will then come free and you can move it to your work area. Either keep the 2 screws somewhere safe or, if you prefer, you can screw them back into the mount on the extruder for safe keeping.
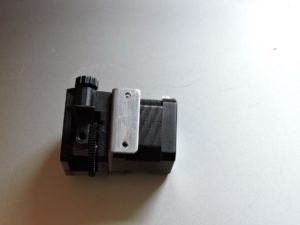
This is the removed extruder. The tensioning screw is top left and you can see the mount plate screw holes here. The right portion of the unit is the stepper motor.
At this point you should unload any tensioning by winding the tensioning screw to the right (ie clockwise) until it stops – don’t force it once it stops its done. If you leave any tension wound on at this point it may cause problems when you come to open the case and will make refitting the tensioner much more difficult.
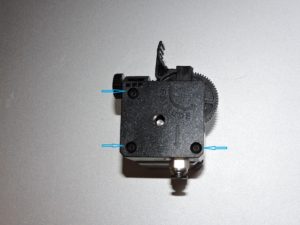
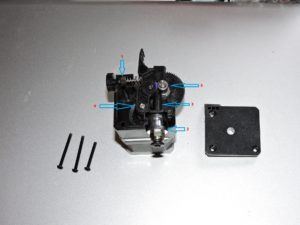
Now you need to open the body of the extruder. You will need a 2mm hex key for these 3 screws. They are not particularly tight but start slowly to avoid rounding any of the heads off. Note that the shorter screw goes in the bottom right hole. As you remove these keep light pressure on the top of the extruder since the tensioning spring inside may try to lift the top. When you have all 3 screws out slowly release the pressure on the top and it will (most likely) lift a little. If you allow it lift too far the tensioning spring can fly out and then you have a search on your hands….
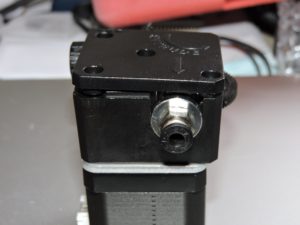
Slowly lift the lid of the case. As mentioned, the tensioning spring may try to pop out so keep an eye on it – the picture shows how the lid normally sits with the screws removed. Slowly lift it off and place it separate.
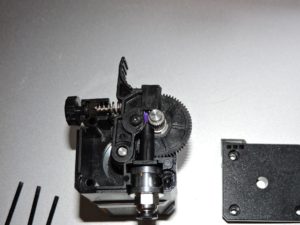
This is the extruder with the casing removed. You can see, in this photo, a piece of filament lodged in the extruder gear. This has snapped from the end of a section of filament while removing it to change material. Top left is the tensioning spring which will be the first part you remove – until this is done do not attempt to move anything else of you will have an escaping spring on your hands.
All of the parts can be removed by hand – you should do them in the following order.
1 – Tensioning screw and spring. Remove both together. Lift them out using the knob as a handle and place them, knob downwards (see next photo) to avoid the spring escaping.
2 – Bowden connector. Simply lift it out of the extruder body and place aside.
3 – Extruder throat. Lift out by the locating flange at the bottom and place aside.
4 – Tensioning lever. Grasp the sides of the lever at the pivot (metal pivot at the bottom) and slide the lever off the pivot – requires a little pressure but shouldn’t need excessive force.
5 – Extrusion gear. Grab the metal part of the gear with fingers and lift the entire piece out of its bearing. The bearing remains in the extruder body.
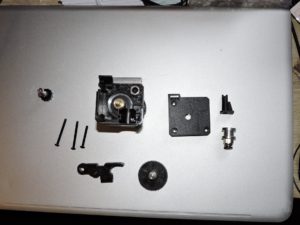
This is the extruder with all of the serviceable parts removed. To the left is the tensioning spring and knob (as mentioned earlier) stored upright to prevent the spring escaping.
At this point you should get a small brush and clear out any plastic shreds or dust from all of the separate parts and also the body. If you have a small length of filament to hand its worth passing it down the black plastic ‘throat’ (top right) to ensure there are no bits inside. We don’t recommend removal of the drive gear (center of the body) since realigning it on the shaft is a bit involved. This is as far as you need to go to get the extruder clean and serviceable.
Now reassemble the extruder by working your way back through these instructions. The process is an exact reverse of what you’ve done so far with a couple of points to note.
When you fit the tensioning lever, set it all the way to the right – ie up against the extruder gear. This will allow the maximum room for replacing the tensioning spring and knob. Check the tensioning knob assembly to ensure the nut is all the way to the knob – if not, hold the nut and turn the knob clockwise until it stops.
Hold the top of the casing down when you fit it and then fit the screws finger tight to begin. When you tighten these screws be careful not to overtighten them – the only need to hold the case together and they are easy to strip.
Before you reconnect the Bowden tube you may want to feed some filament through the extruder – it makes feeding it simpler than when the tube is in place. Finally readjust the tensioner as required.
Happy printing 🙂

